How we store & send player color in the Minute of Mayhem game lobby
This documentation will explain how we save, load and change player color in Minute of Mayhem, starting with how player preferences are stored at run time and then made persistent by saving and loading them with User Cloud and finally how that color is sent to other players via the party system.
It is designed to read while you have the Minute of Mayhem example project open as a reference.
Overview
The documentation below refers to the following assets and systems
Assets
- Player Preferences:
Content\Redpoint\Game\Player\PlayerPreferences.uasset - Minute Game Instance:
Content\Redpoint\MinuteGameInstance.uasset - Player Preferences Screen:
Content\Redpoint\MainMenu\Screens\PlayerPreferences\PlayerPreferencesScreen.uasset - DefaultEngine.ini
Redpoint\MinuteOfMayhem\Config\DefaultEngine.ini - Main Menu Lobby Slot:
Content\Redpoint\MainMenu\Screens\Lobby\MainMenuLobbySlot.uasset - Main Menu Player Preview
Content\Redpoint\MainMenu\MainMenuPlayerPreview.uasset - Lobby Screen
Content\Redpoint\MainMenu\Screens\Lobby\W_LobbyScreen.uasset
Systems
- Saving and loading is done with user cloud
- Colors are sent to other players as party data using the party system
- Player preferences are stored in a
USaveGameobject from Unreal Engine's Save Game system - The player preferences object is stored in a variable on minute game instance which is a
UGameInstancefrom Unreal Engine's Game Instance system
Storing player color at runtime
When a player chooses a color they expect the game to keep track of that color, in this example we created a blueprint called player preferences which inherits from USaveGame to store that data in a format that is easy to save and load.
In order for player preferences to persist between maps it will need to be stored somewhere that it won't be unloaded as part of changing maps and do that with minute game instance which inherits from UGameInstance.
Loading player color at login
User cloud allows for data to be saved by file name, which can be used for logically separating data for example save slots or storing different types of data in different file names. In this example we serialized player preferences and save it in a file called 'PlayerCharacterDataFileName'.
For more info see the user cloud documentation and Saving User Cloud data files below for more details about how player preferences is serialized.
Bonus note: The text 'PlayerCharacterDataFileName' is stored inside of a variable to avoid any accidental typos which would unexpectedly save or load data from an incorrect save file name.
Preloading User Cloud data files
Usually you will need to run Enumerate User File to load / open the latest version of the current user files and then call Read User File before finally reading the contents with Get File Contents.
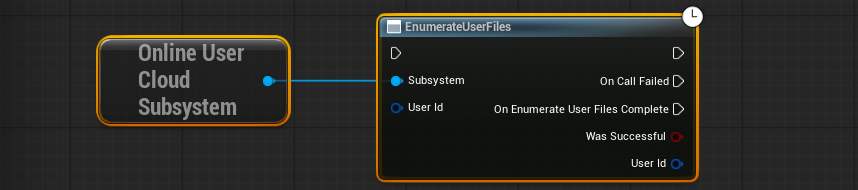
However preloading user cloud data files allows us to skip the Enumerate User File and Read User File step as that will be done as part of preloading.
Preloading can be configured by editing DefaultEngine.ini and adding !PrecachePlayerDataStorageFiles to the [EpicOnlineServices] section, repeat line 140 below for as many file names as you would like to preload (for example change 'PlayerCharacterDataFileName' to the file name that you would like to preload).
DefaultEngine.ini Redpoint\MinuteOfMayhem\Config\DefaultEngine.ini 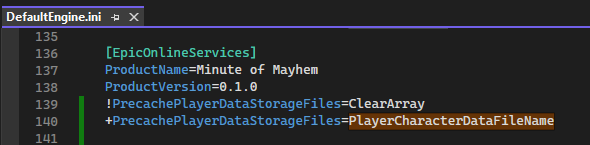
Initialize Minute Game Instance
Minute game instance has an initialize step triggered by Event Init which sets up the following:
- A new instance of player preferences is created and stored in Minute Game Instance's player preferences variable
On Login Completeis bound to the online identity system's OnLoginComplete eventOn Login Completeshould be called if the player is already logged in as playing in-editor with "Login before play-in-editor" enabled means the player will be already logged in andOn Login Completewill not be triggered
Minute Game Instance Event Init
Reading Player Preferences from User Cloud data files
The initialization logic above should guarantee that On Login Complete is triggered exactly once after the player is logged and the cloud data files contents.
We then use Get File Contents and Read File Data As Save Game to read player preferences. This leaves us with a USaveGame object which we cast to a Player Preferences object and set to the player preferences variable on Minute Game Instance .
Note: The Enumerate User File and Read User File steps are skipped as we have (preloaded the player's cloud data files in the previous step).
We then send the player's color to their party now that player preferences is ready to use.
Minute Game Instance On Login Complete
Saving User Cloud data files
Player preferences are serialized with Create File Data from Save Game and then save it into a file called 'PlayerCharacterDataFileName' using the asynchronous task WriteUserFile.
Minute Game Instance Save Player Preferences to Cloud in Background
Selecting player color
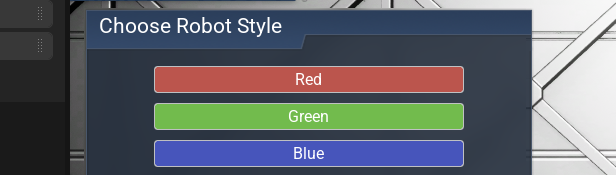
The red, green and blue buttons are located in the player preferences screen and they each trigger the Change Player Color event in minute game instance with their respective colors.
Player Preferences Screen
Handling Change Player Color events
The player's color is changed with Change Player Color in minute game instance. First the Robot Color variable in player preferences is set the new player color and then Save Player Preferences to Cloud in Background is executed to save the new color to user cloud followed by Send Player Color To Party to send the new color to party members.
Minute Game Instance Change Player Color
Sending player color to party
Send Player Color To Party uses the party system to send data to party member as party member data.
See managing party data documentation for more info.
Overview
There are three logical steps to Send Player Color To Party:
- Get a reference to the player's party member data
- Update the player's party data with the new color
- Send the updated party member data to the party
Get party member data
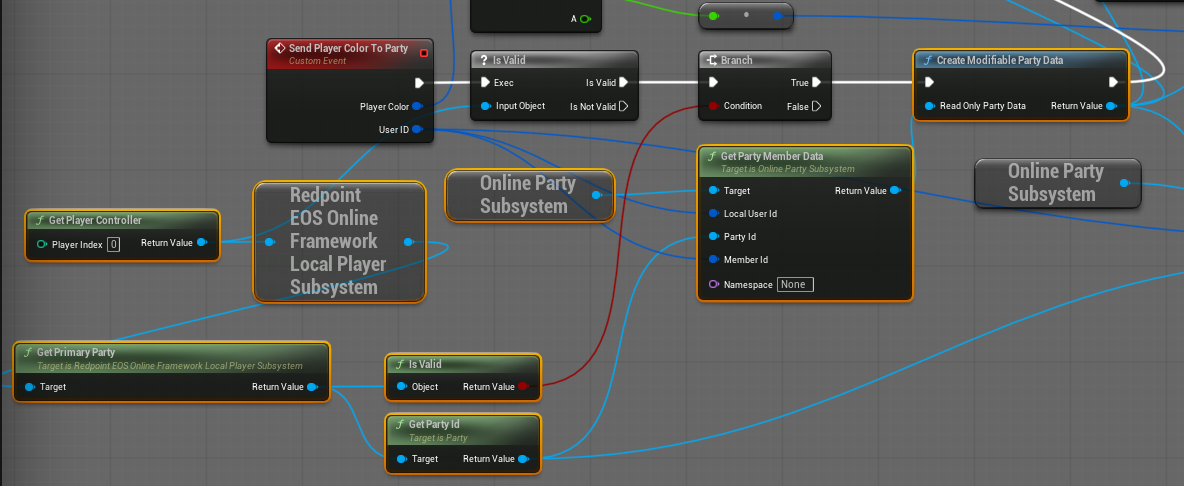
Get Player Controller is used to get a reference to the player controller which is then used to get a reference to the local player subsystem, which then uses Get Primary Party to get a reference to the player's primary party.
The party ID is then used to get the player's member data using Get Party Member Data and then finally a modifiable version of party data can be created with Create Modifiable Party Data which we will use in the next step to modify the player's party member data.
Update party member data
Party member data is stored as key / value pairs with a string as the key, and variant data as the value. Variant data can only store Boolean (true/false), Double (a decimal number with double as many decimal places as a float), Int64 (a very large whole number), or a String (text) values.
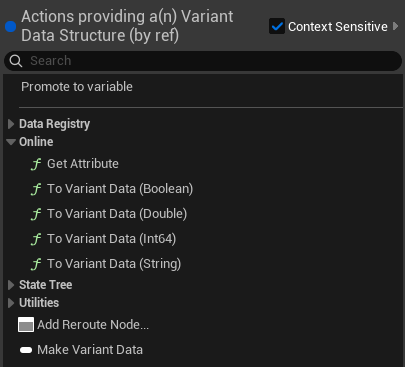
Since the Linear Color variable can not be directly sent via party member data we must instead send the red, green and blue values as separate variant data variables. First we convert the red, green and blue color channels from the Linear Color to floats and then to doubles so that they can be stored in the player's party data as PlayerColorR, PlayerColorG, and PlayerColorB string keys.
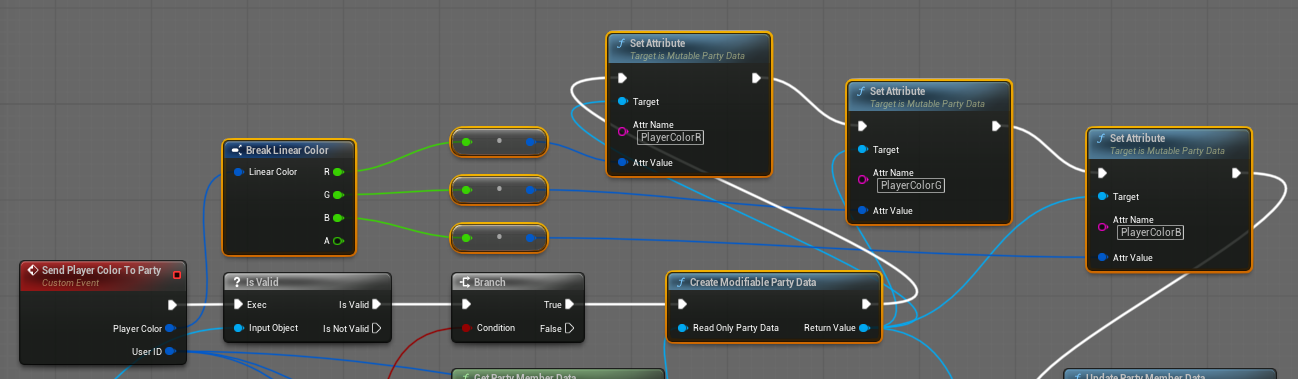
Send party member data
Now that the player's party member data has been modified it is sent to the party by executing Update Party Member Data, you can see where that happens at the very last node in the full blueprint below.
Full Blueprint
Minute Game Instance Send Player Color To Party
Receiving player color
This section covers reading player color from party member data and updating the player preview with that color.
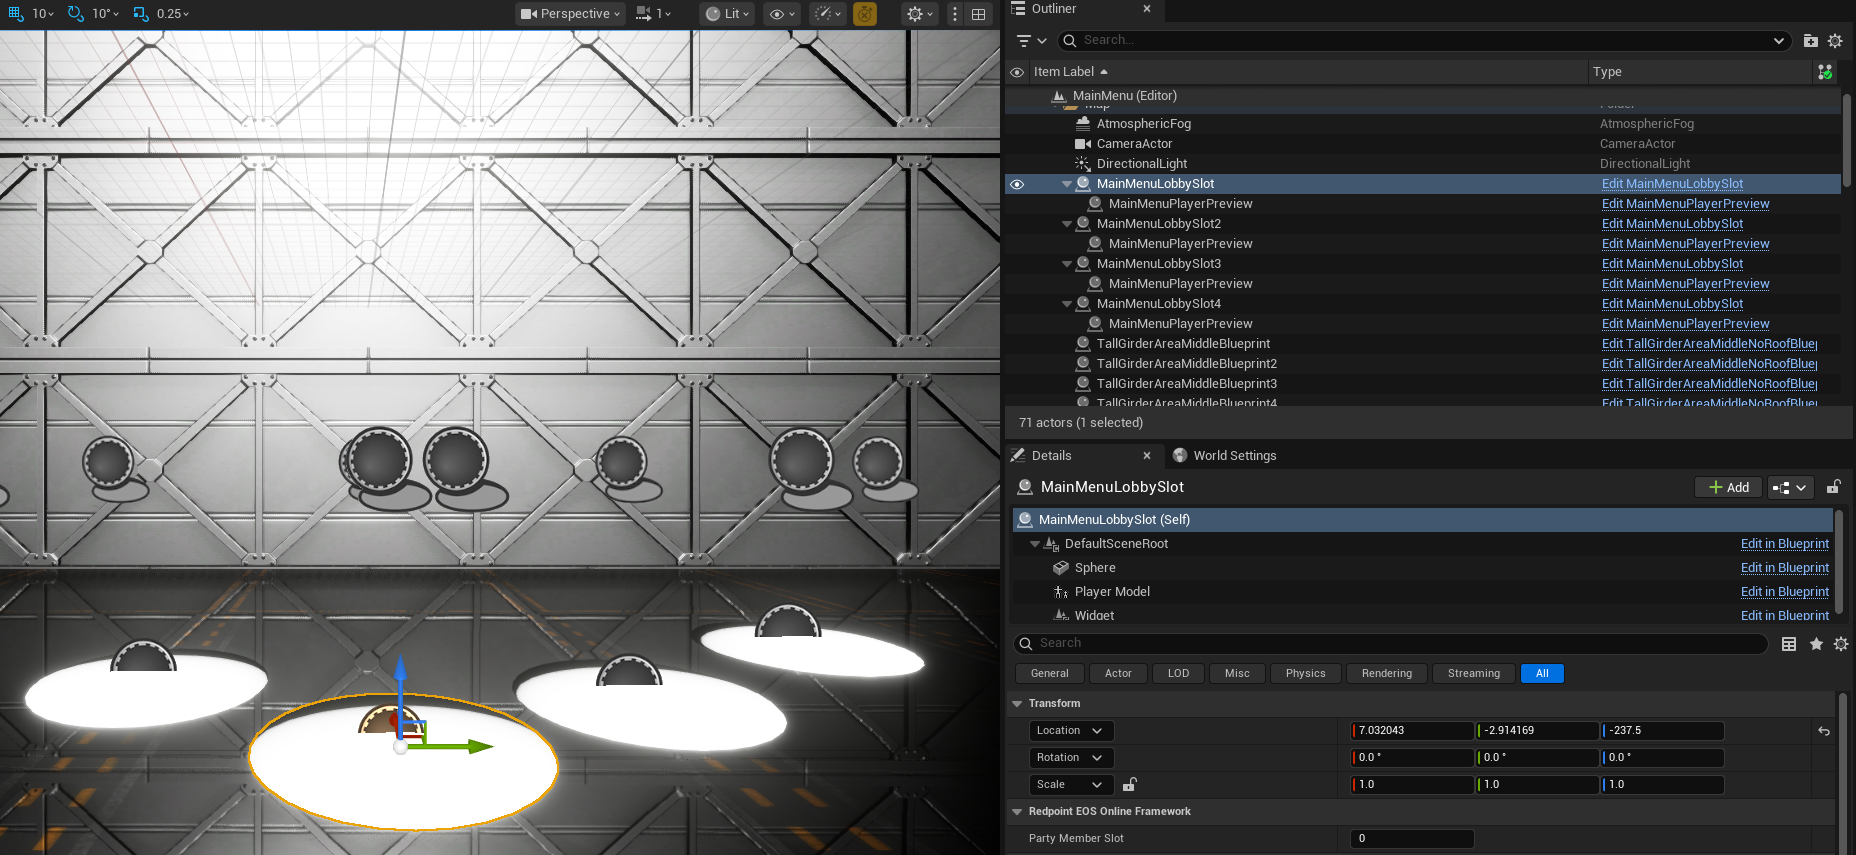
Lobby Slot & Player Preview structure
Lobby players are represented by Main Menu Player Preview which are child blueprint actors of Main Menu Lobby Slot and allow for player models to be set as visible or hidden as players leave and join the player's party.
Note: Main Menu Lobby Slot blueprint actors inherit from ARedpointPartyMember to receive events when party member changes.
Party Member Changed event
Party member changed events are triggered whenever a member of the player's party joins, leaves or when their party member data changes. For instance it is triggered each time any party member executes Update Party Member Data from the Sending player color to party step above.
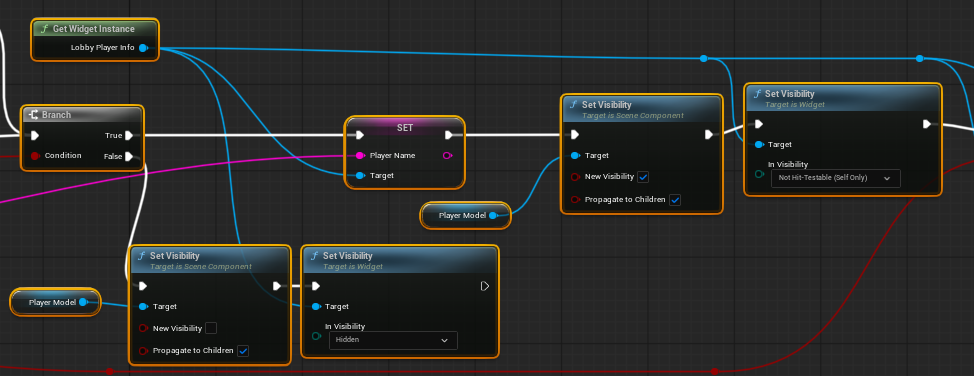
Set Player Preview to visible or hidden as required
The first section of Main Menu Player Preview's Event PartyMemberChanged sets the player model to visible or hidden depending on if there is party member data for that party slot (for example if there is a player in that slot).
Set Players to ready or not ready
If the player is visible we then set if the player is ready or not and if they are the party leader
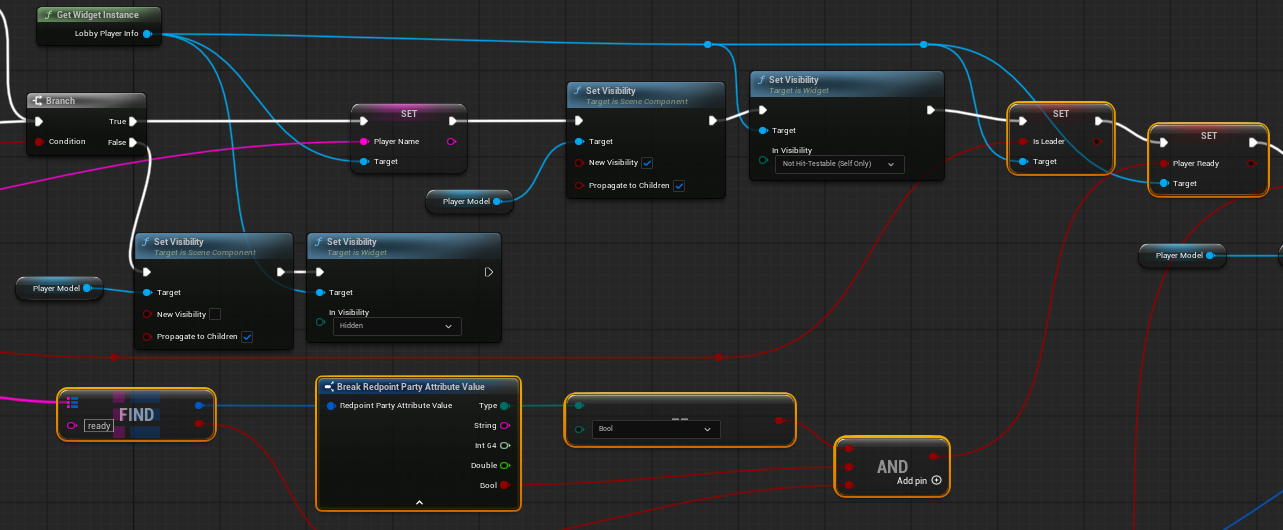
Deserialize player color
After that we turn the red, green and blue doubles from party member data are turned back into a linear color ready to be used to be used on the player preview model
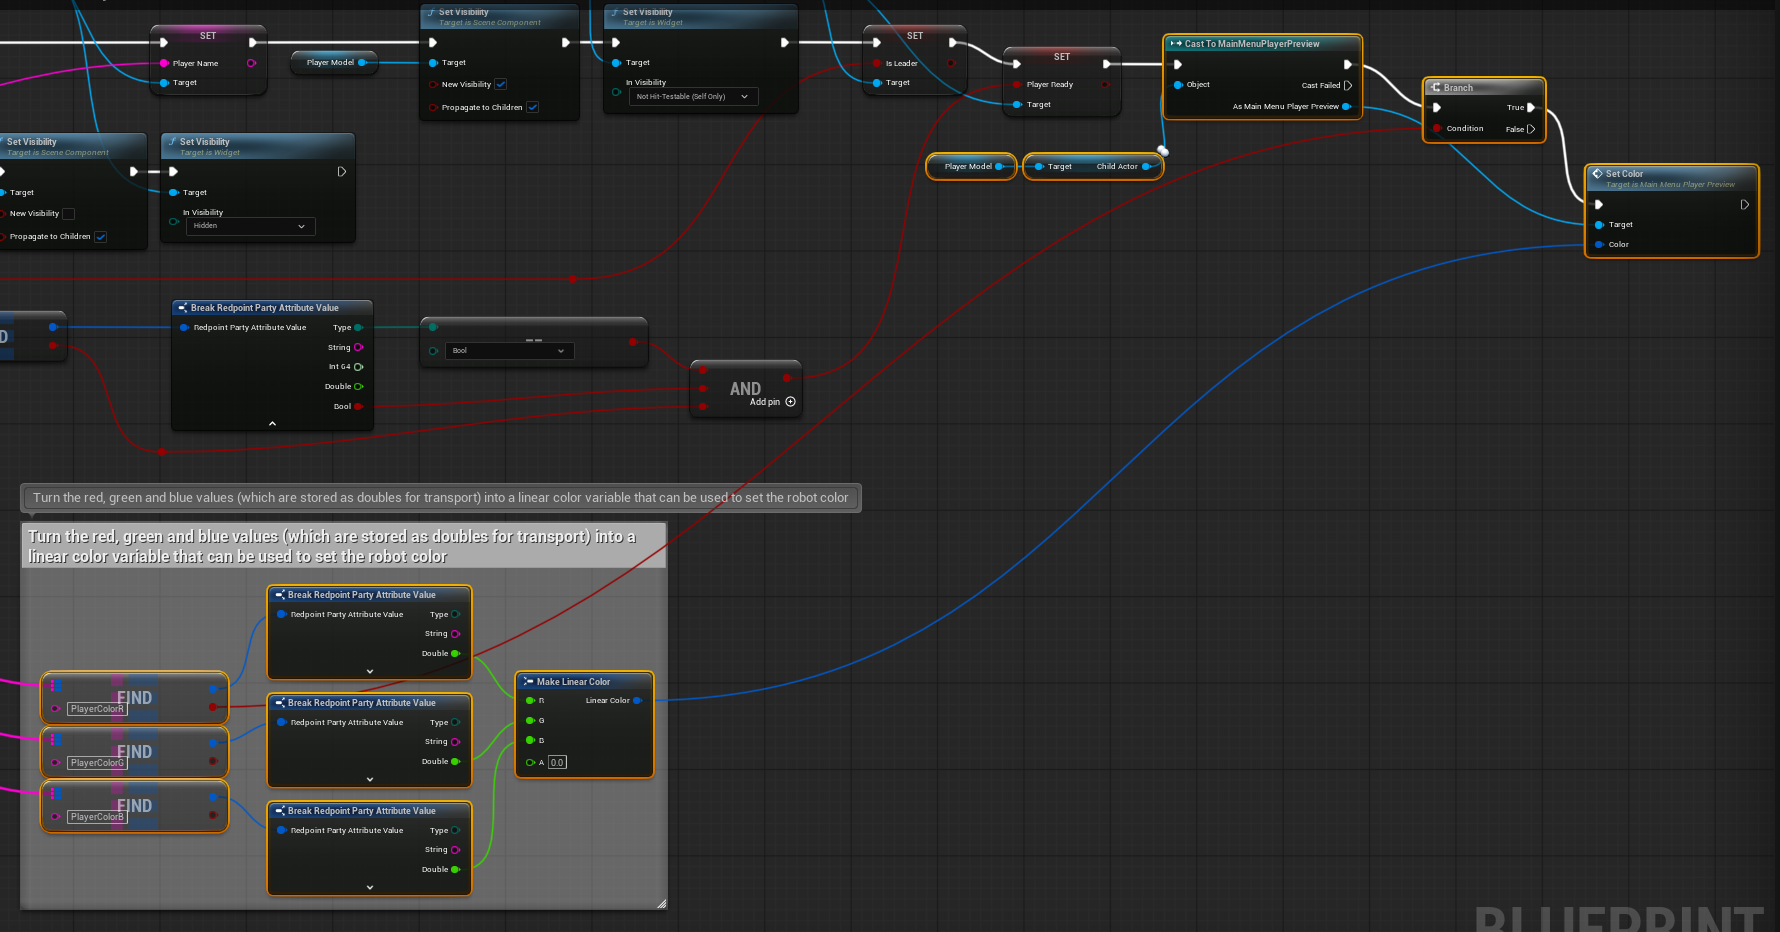
Set the model color
And finally the last step is to set the color of the player preview model
Main Menu Player Preview Set Color
Full Blueprint
Main Menu Lobby Slot Event PartyMemberChanged